How to make a Double Flap Card

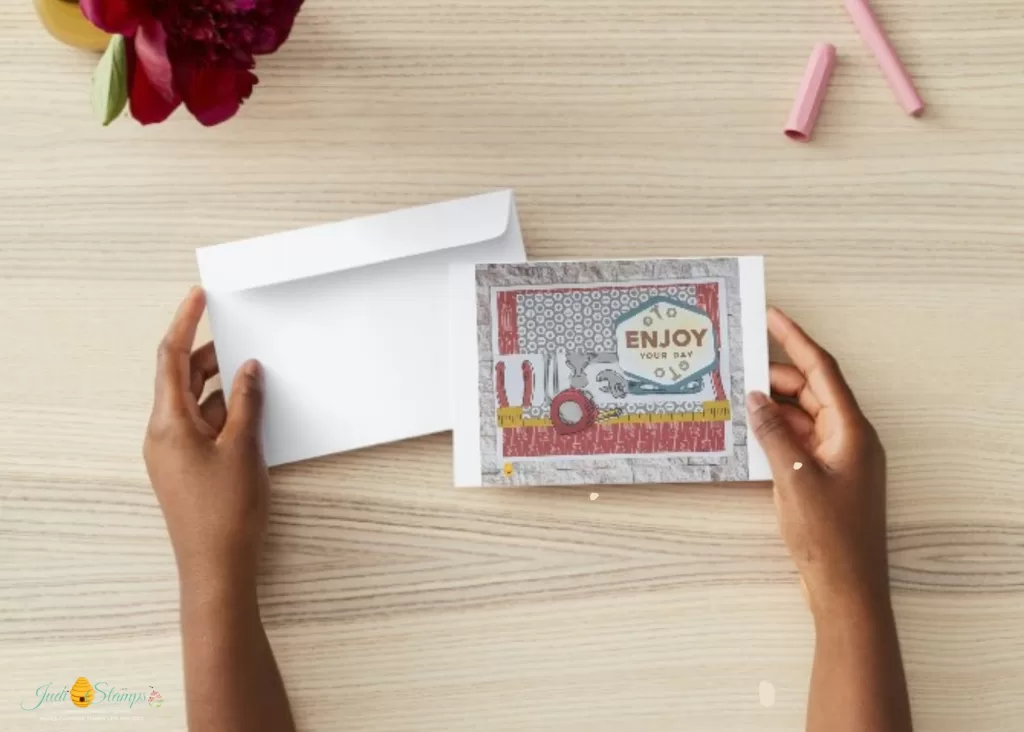
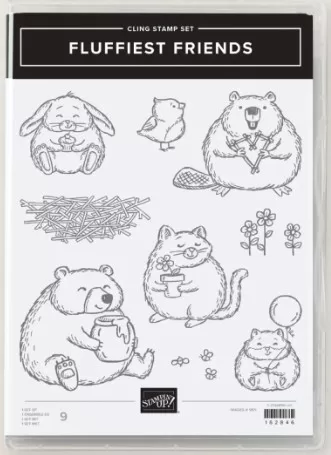
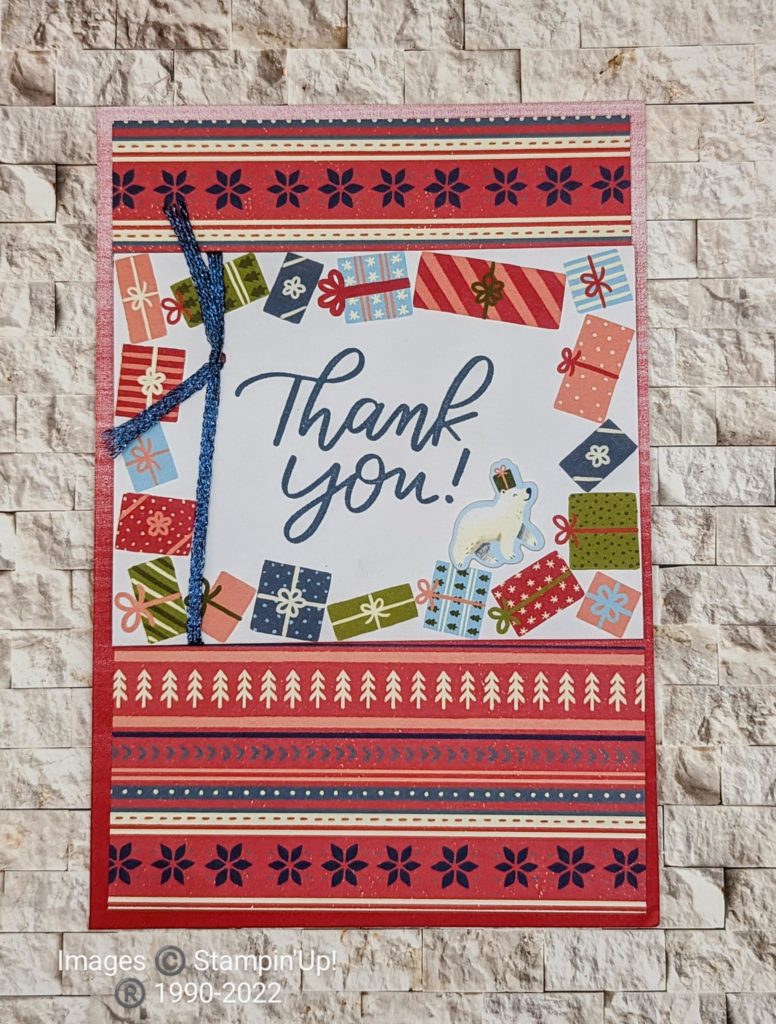
How to make a Double Flap Card using the Fluffiest Friends Bundle? You will learn that it is quite a bit easier than it looks!

I teach a live FREE Class every Tuesday on my Facebook Page. Yesterday I taught the Double Flap Card using some cute critters from the Fluffiest Friends Bundle. I feel these critters are “cheeky squeezable”, adorable! Each time I create a project I have a new favorite image.

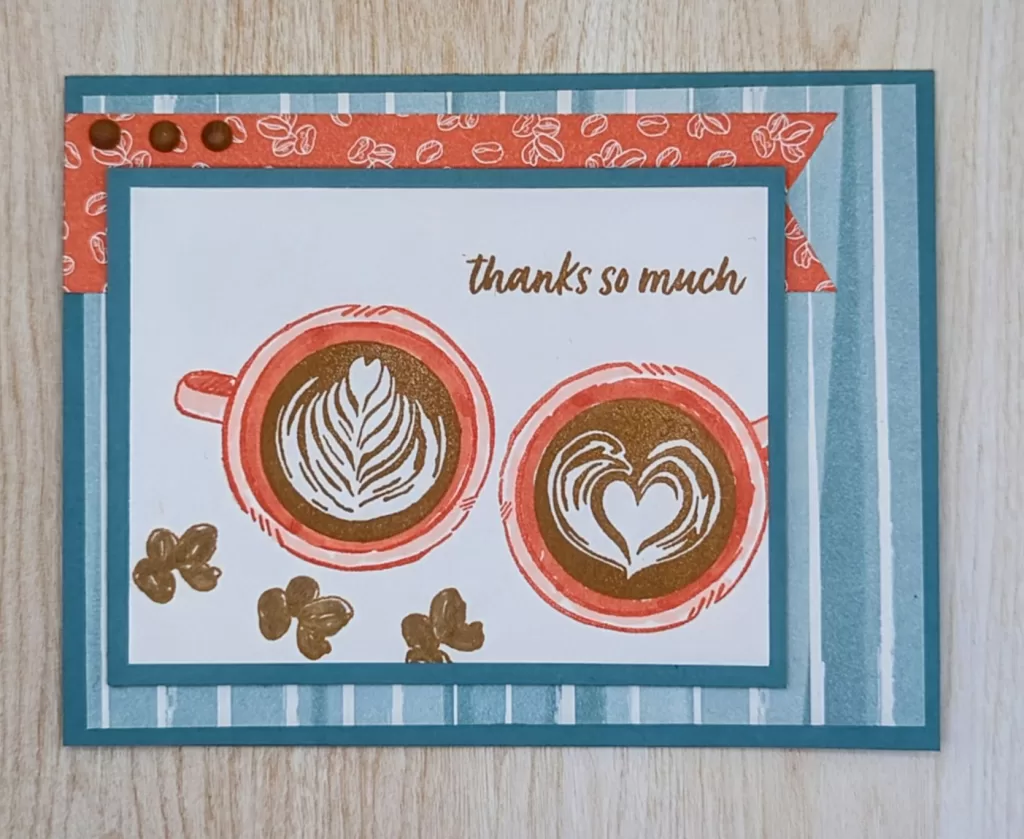
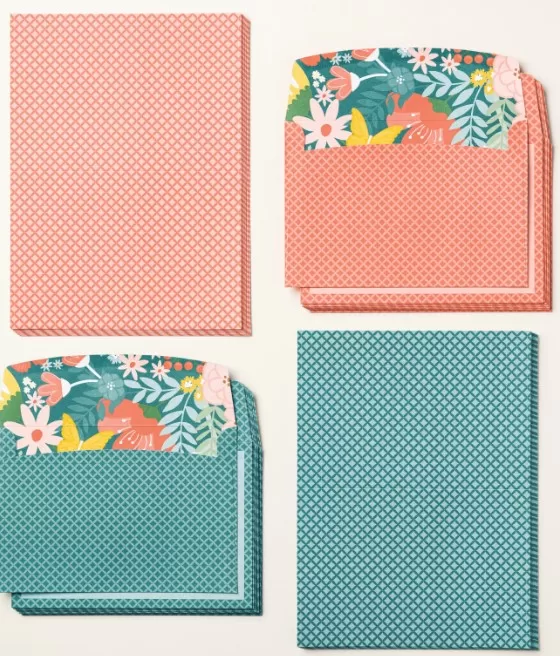
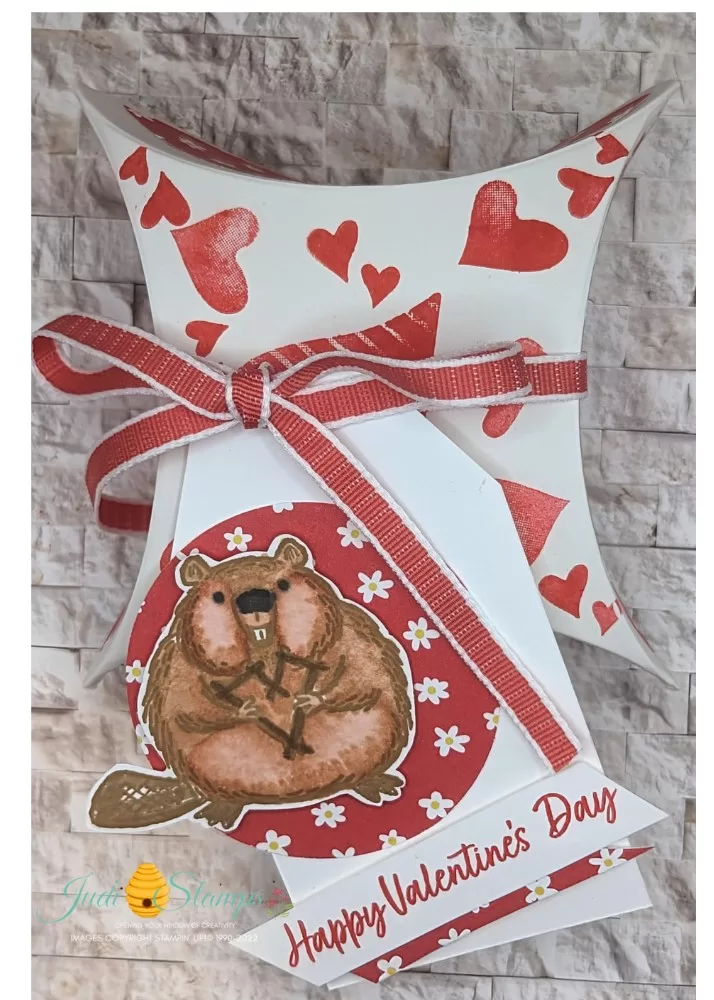
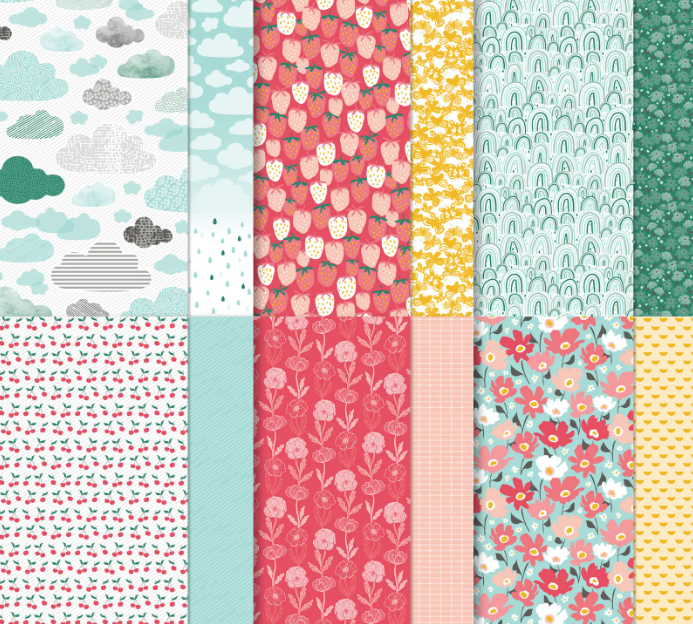
My color choices are bright, vibrant colors. Using the new Peach Pie as my main color then adding; Summer Slush, Real Red, Lemon Lime Twist and Memento Black for a bright card. I colored my images with our Stampin’ Blends Alcohol Ink Markers unless noted.

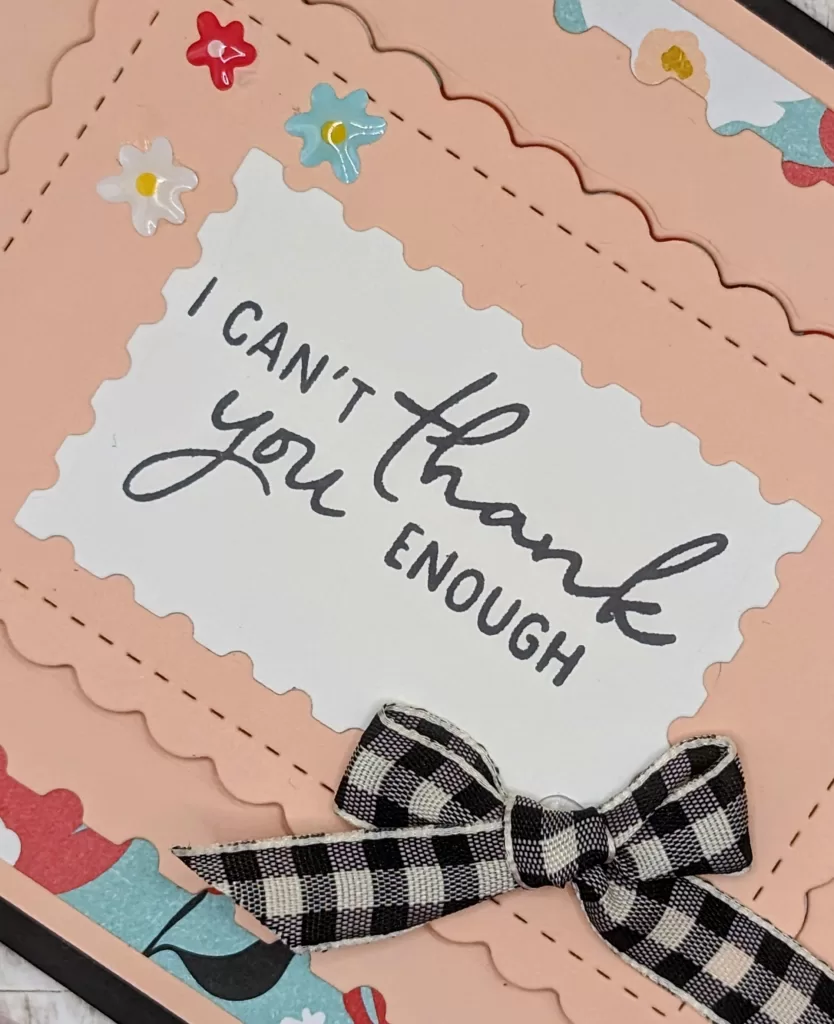
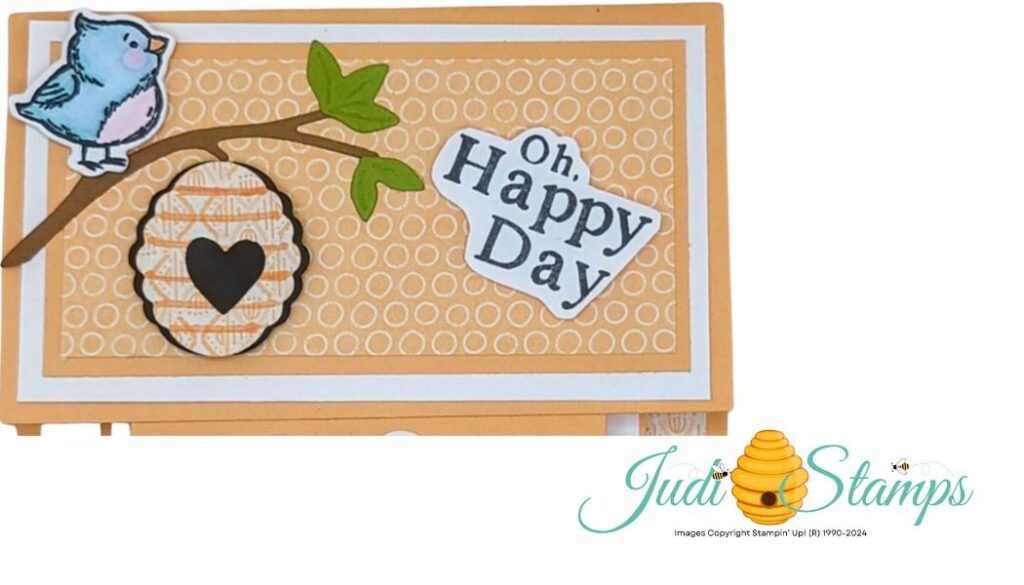
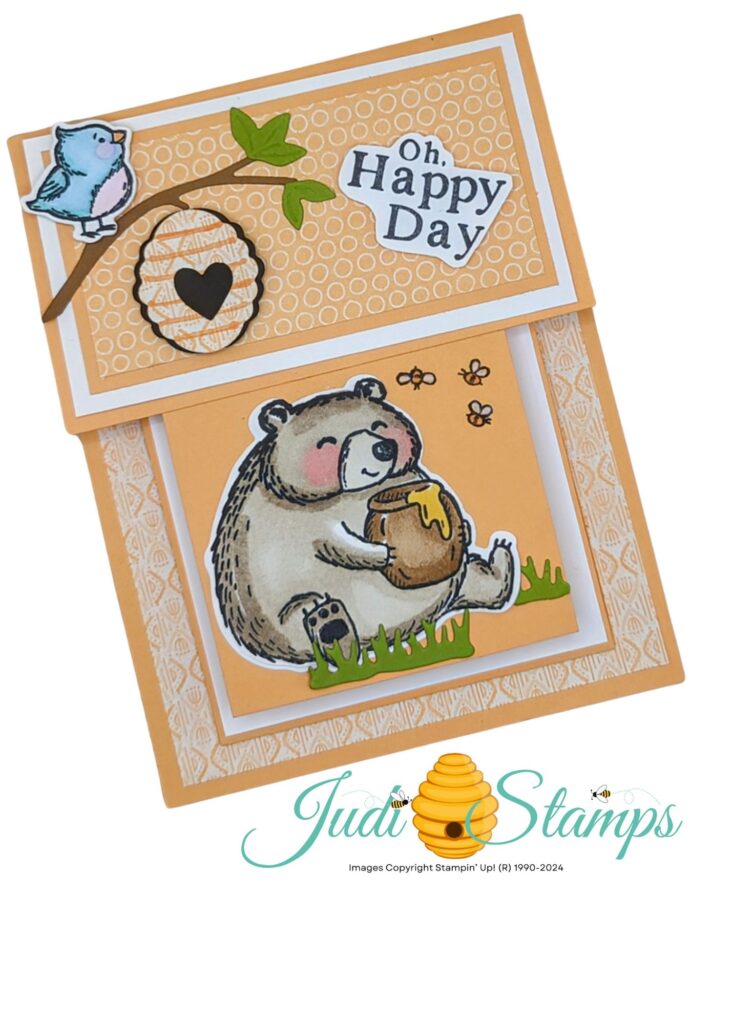
This is the top of the card front. I added detail to the beehive with my Peach Pie Stampin’ Write Marker. The punched heart is from the Bee Builder Punch. Light Balmy Blue & Summer Slush are the perfect colors for the bird. The sentiment is a favorite and found in the Playing in the Rain stamp set.

How to make a Double Flap Card with Fluffiest Friends Bundle

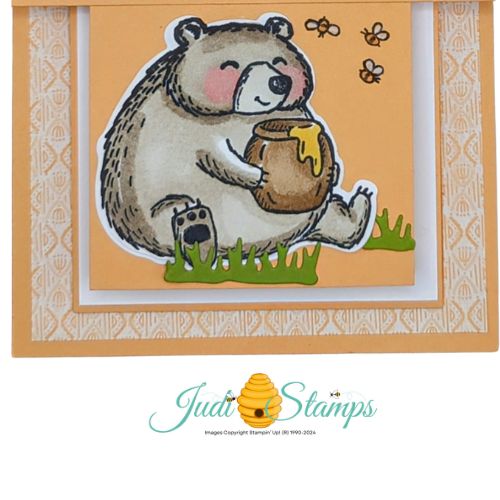
This chubby bear is on the bottom half of the card front. Coloring this image, I used the light and dark Crumb Cake & Pecan Pie, light Pretty In Pink, our white watercolor pencil and Peach Pie Stampin’ Write Marker.

double flap fold

Images © Stampin’ Up! ®1990-2024

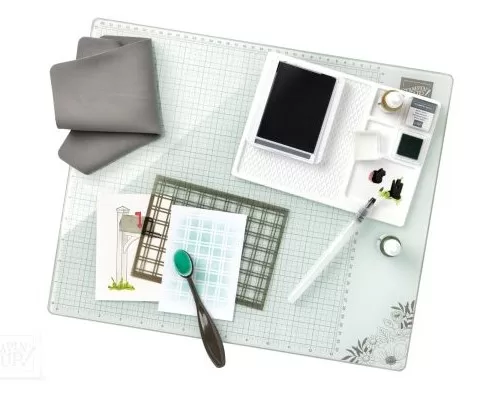
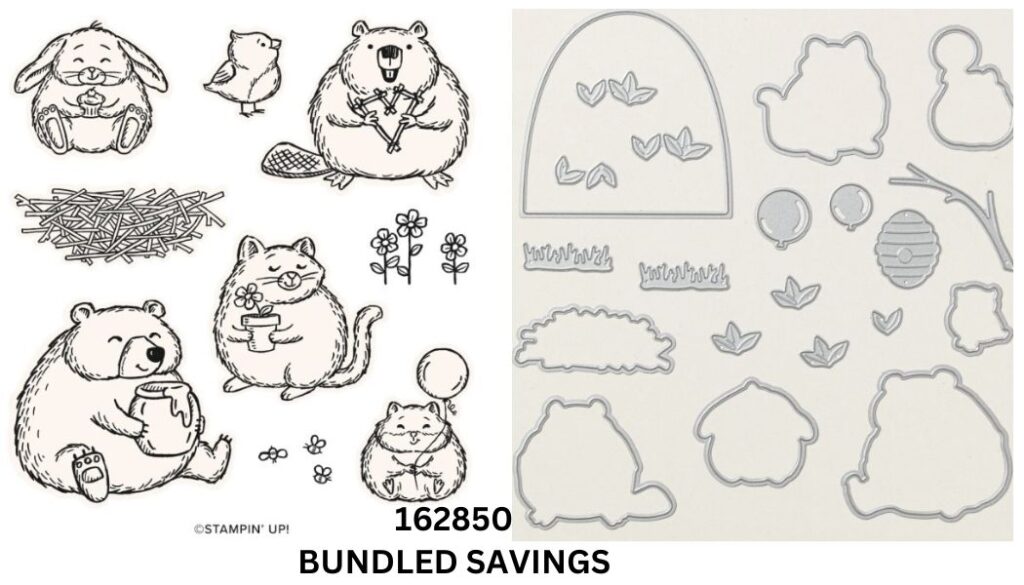
How to make a Double Flap Card with all the above pieces.

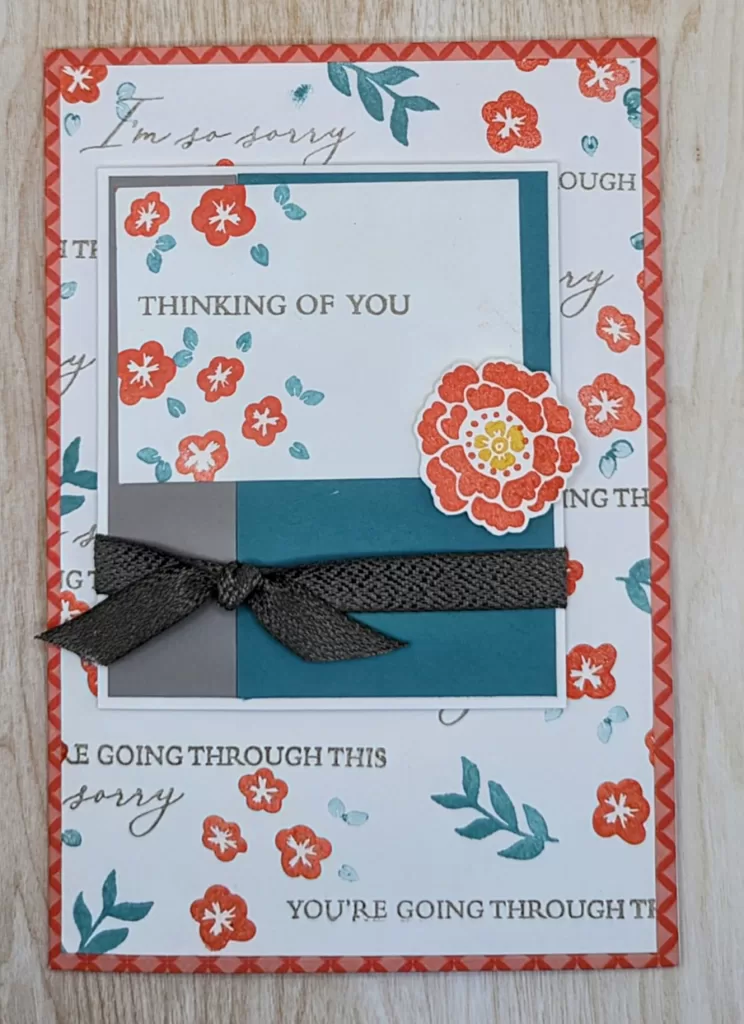
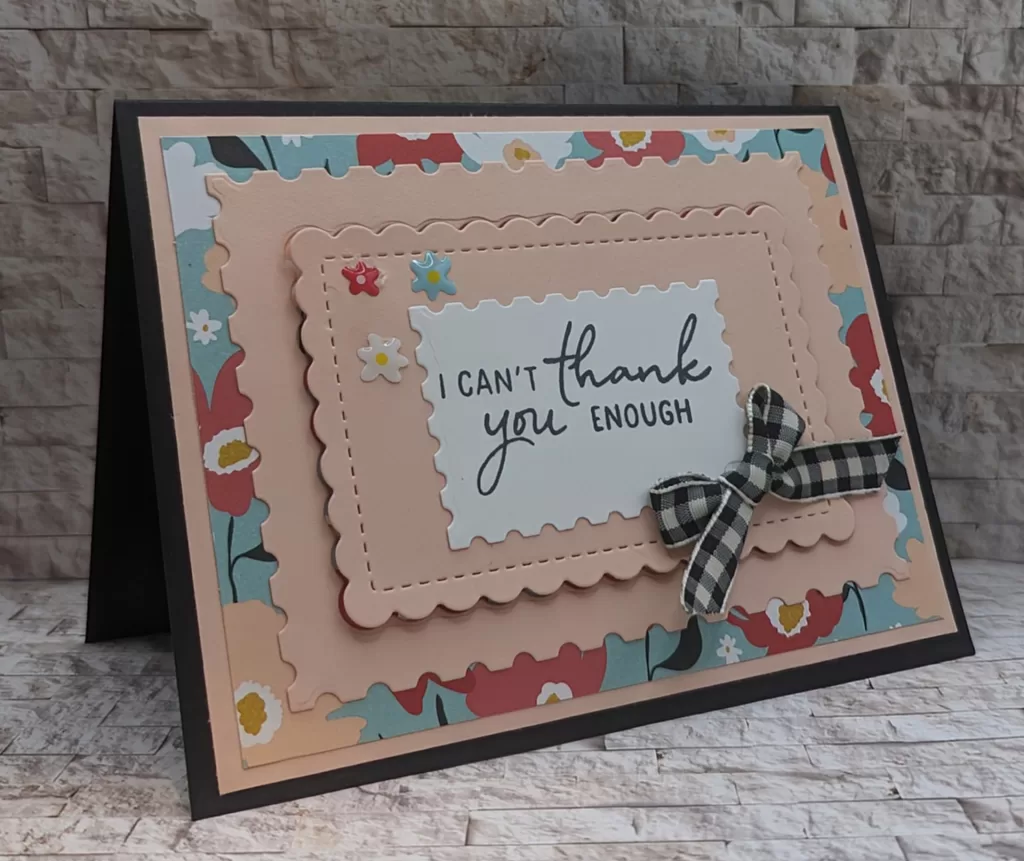
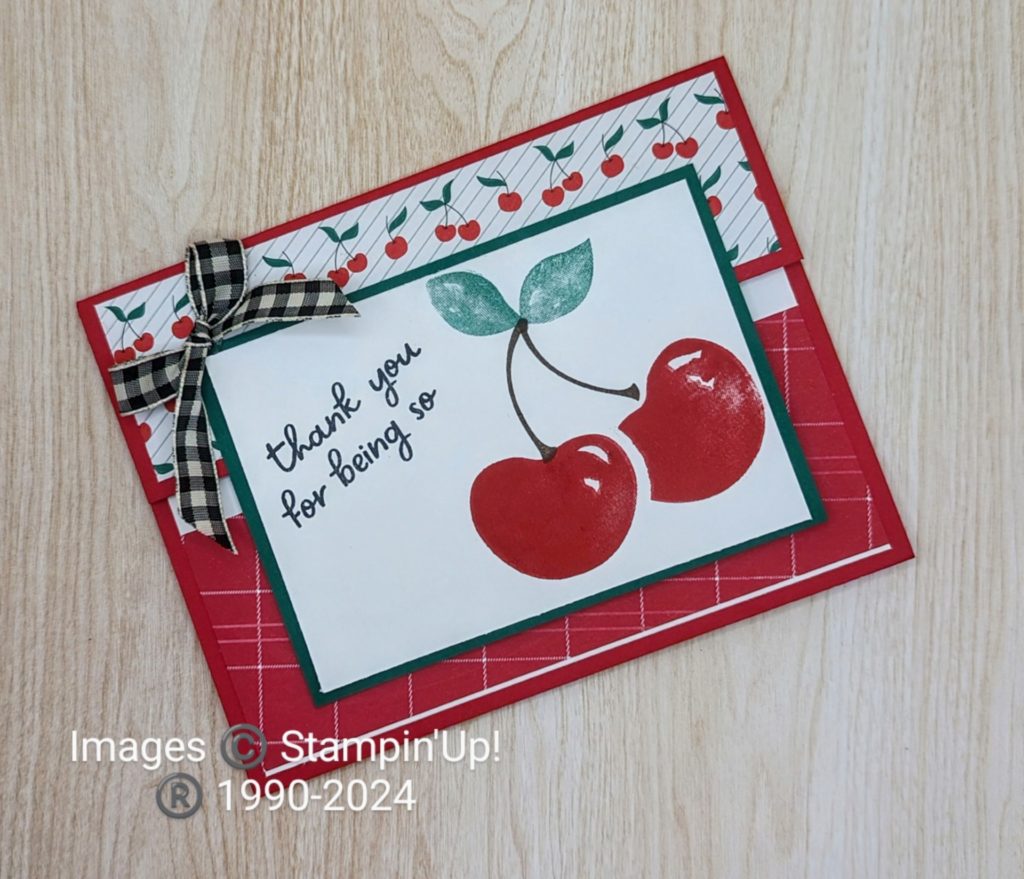
Putting all the pieces together, this is how the card looks.

How to make a Double Flap Card

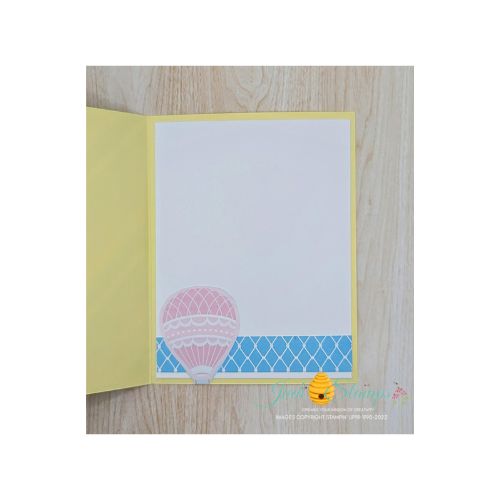
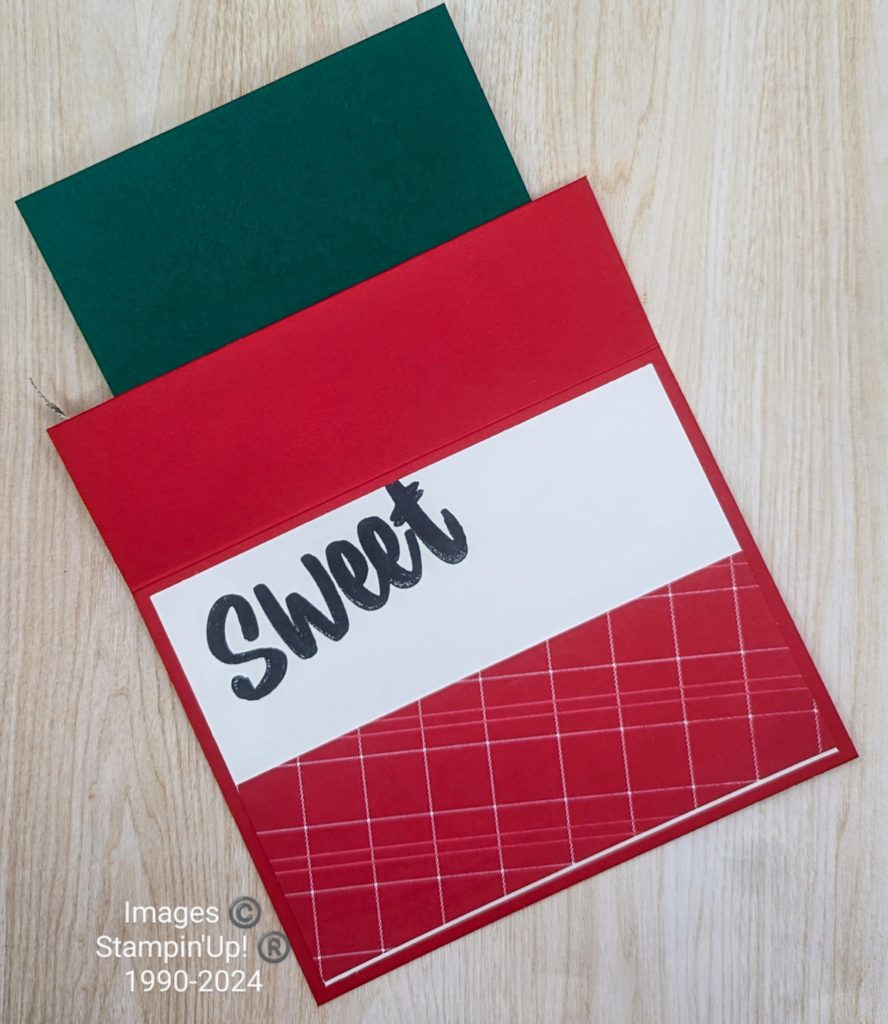
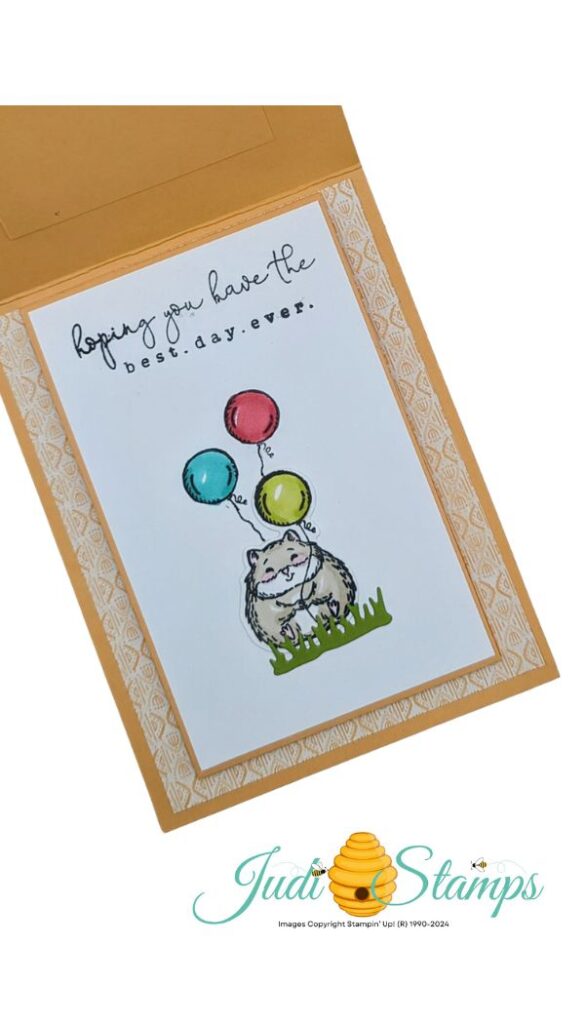
Open the card and this chubby cheeked hamster is the next to send greetings your way. The NEW Country Birdhouse stamp set has the perfect sentiments to express your thoughts. I had to do the omitting technique to fit it onto this piece of Basic White.

Fluffiest Friends Bundle

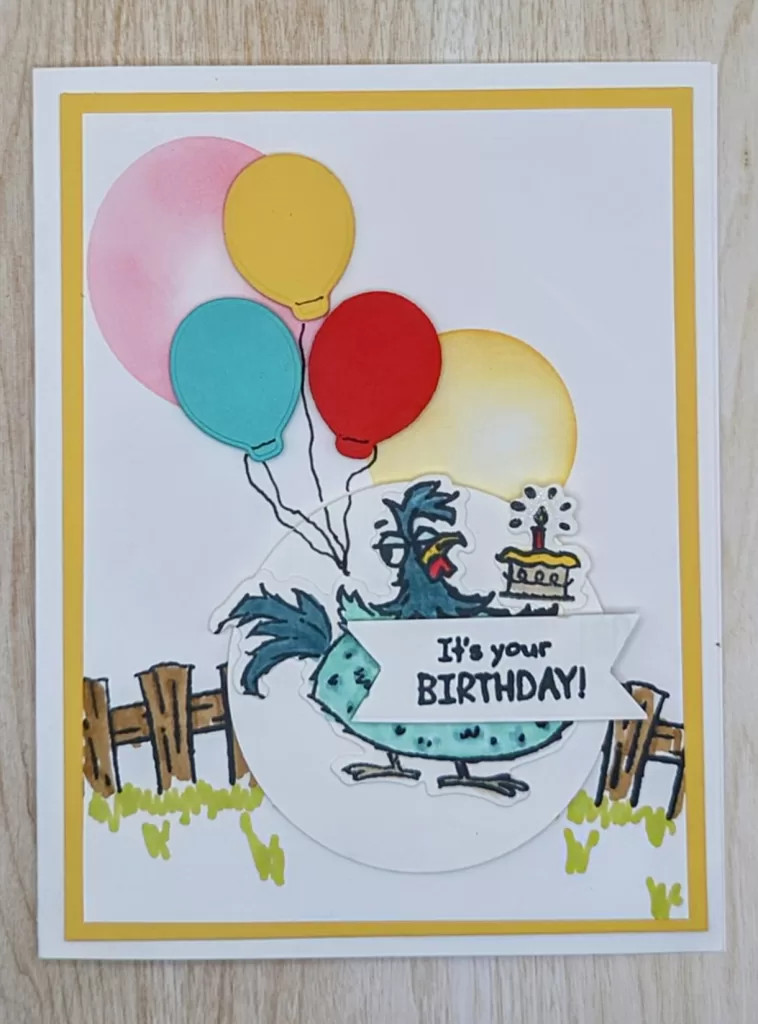
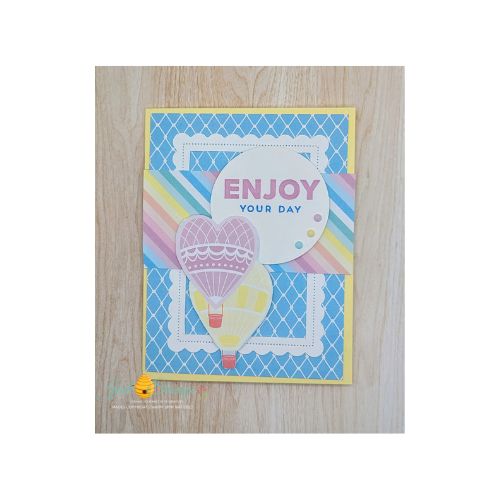
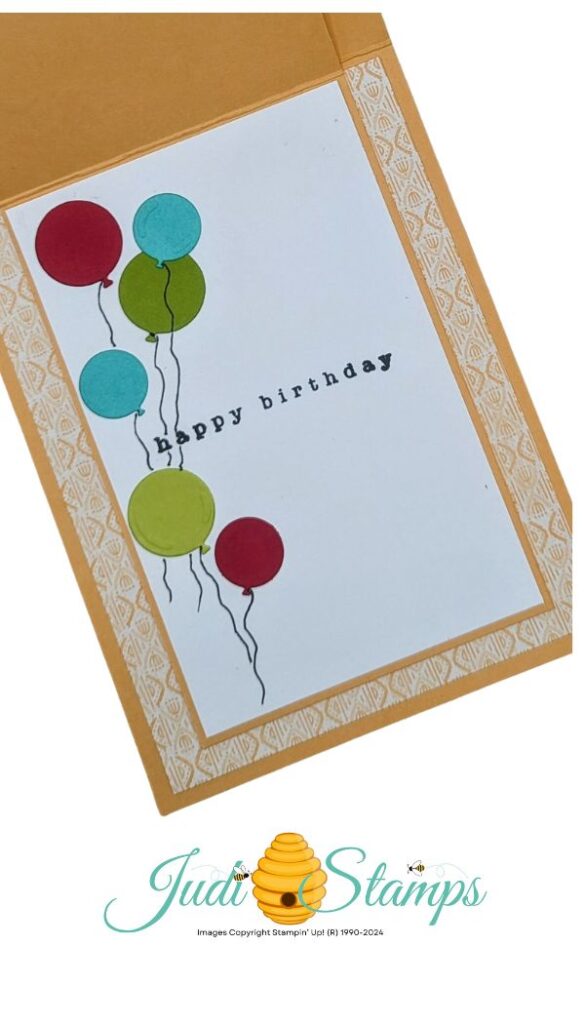
Die-cut balloons and Happy Birthday wishes fill the final layer of my card. I hand drew the balloon strings with a Basic Black Stampin’ Write Marker.

double flap card easy special fold

Check out this project that also uses the Fluffiest Friends Bundle

Here are the measurements for the layers:

  • Base 1 is 10 3/4″ x 4 1/2″ scored @ 5 1/2″
  • Base 2 is 3 1/4″ x 10″ scored @ 5″
  • Basic White: 2 1/4″ x 4″, 2@ 3 1/2″ x 4 3/4″, scrap for images and sentiment
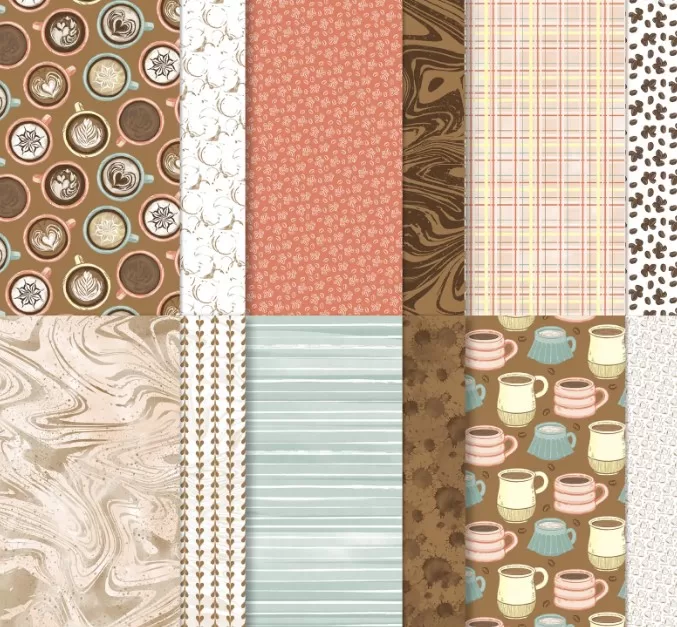
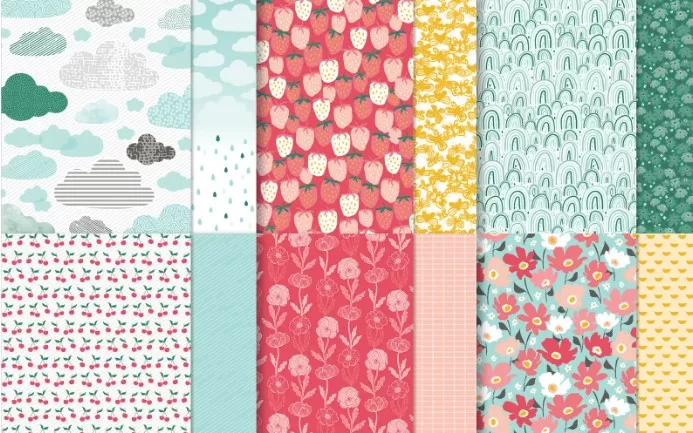
  • Designer Series Paper: #1- 4″ x 5 1/4″, scrap, #2- 2″ x 3 3/4″
  • Scraps of: Summer Splash, Real Red, Pecan Pie, & Granny Apple Green

For all the details on how to make this double flap card watch this video!

Be sure to subscribe to my You Tube Channel to watch a FREE CLASS every Tuesday at noon (CT)

SUBSCRIBE HERE

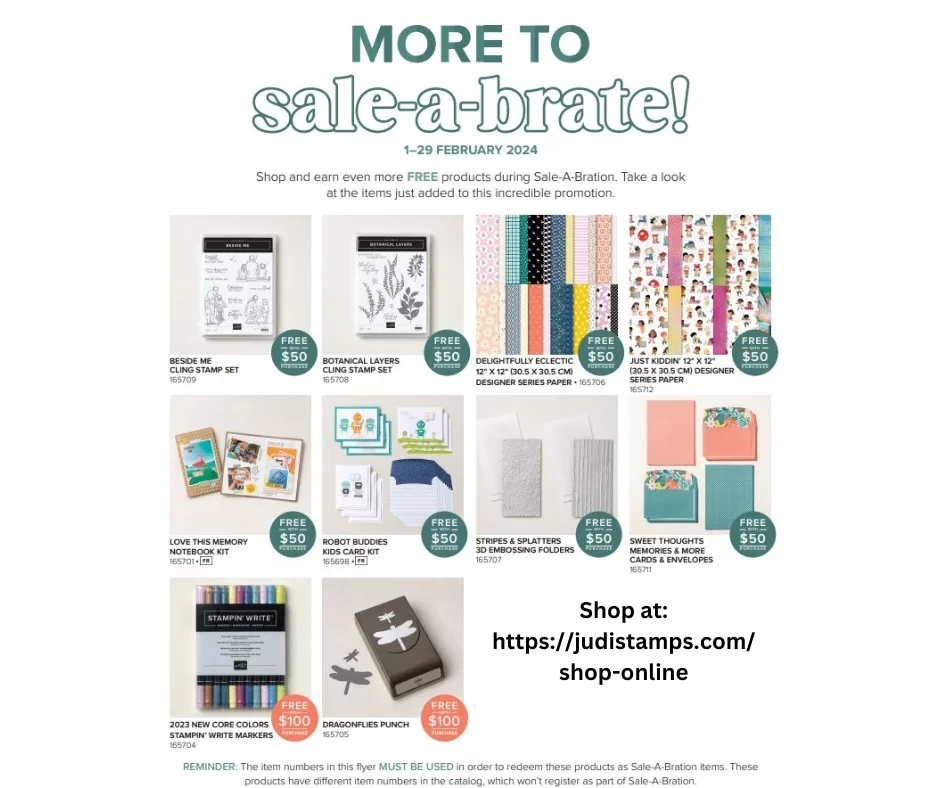
All of the products I used can be purchased through my ONLINE STORE

Until we meet again. . .

Judi's online store

Annual Catalog Celebration free just for you!

Annual Catalog Celebration

Announcing our Annual Catalog Celebration happening on May 10th! The Crafting Across Borders team of Stampin’ Up! demonstrators are busy planning a special event just for YOU!

Come see the new 2024-25 Stampin’ Up! Annual Catalog as we create in this fun – and customer complementary – event! Who doesn’t love learning new ideas (FREE!) from demos from across the globe?

Who Can Attend?

All current and future customers of mine who love to paper craft! The only requirement is you must live in the United States!

If you are a Stampin’ Up! demonstrator, you are most welcome to attend as well! Come join us by paying a registration fee of $15.

What Is It?

It’s a free online stamping party! We’re hitting the highlights in the new 2024 – 2025 Stampin’ Up! Annual catalog. We’ll have some games for you, stamp, give away prizes, specials. . . pretty much any kind of fun you can have with Stampin’ Up! products!

Annual Catalog Celebration- let’s meet the global demonstrators;

When is It?

Friday, May 10th starting at 6 PM Central Daylight Time.

What if you’re not available then? You can watch it on the replay whenever you CAN watch!

Where Does It Take Place?

In the comfort of YOUR own home! Join us from;

  • your craft area,
  • your comfy chair,
  • from your deck,
  • at the beach,

just as long as you have an internet connection and are on Facebook, you are in! It all happens virtually through our private Facebook group.

Why Should You Attend?

Because you’re going to want to see this unique catalog in action!

  • Be in a crafting community who are as excited about the new catalog as you are!
  • See awesome new stamps, papers and dies you will love!
  • Get in on exclusive deals!
  • Win prizes with our pre-event games!

How Do You Register?

By clicking below, then filling in the Google form.

SIGN UP HERE!

Judi's online store
Need a Catalog?

Contact me at: judi@judistamps.com

Using the Latte Love Stamp Set for a card Sketch.

Using the Latte Love Stamp Set to create a card for this sketch was my first choice!

Are you ready to indulge in a little creative caffeine? Today, I’m brewing up some inspiration with the Latte Love Photopolymer stamp set and a card sketch that’s sure to perk up your crafting fun. Join me as I explore how to create a charming card using this set and a touch of imagination.

A Card Sketch
This is the card sketch I am using.

The Latte Love stamp set is a delightful collection of coffee-themed images that are perfect for creating cards, scrapbook layouts, and more. With its whimsical designs and sentiments, it’s the ideal choice for expressing your feelings for friends, family, and fellow coffee lovers.

I started with a card base in Pretty Peacock This is a rich and inviting shade that sets the stage for my coffee-themed creation. Next, I layered a striped pattern from the A Little Latte Designer Series Paper (DSP) for the mat. A coordinating banner, from the same paper pack adds texture and interest to the design. I could have chosen any pattern from this pack of paper and it would look awesome. Which two would you choose?

Images Copyright Stampin’ Up! (Registered) 1990-2024

Using the Latte Love Stamp Set for the card sketch was my first choice.

Now, it’s time to create our focal point. Using the Latte Love stamp set, I stamped two coffee cups in Calypso Coral. This is a warm and inviting color that adds a pop of color to our card. It is also the color in my DSP banner. To add depth and dimension, the latte images are stamped in Pecan Pie. this creates a deliciously realistic look that’s sure to make mouths water. Next, I stamped the coffee beans and colored them in using my Pecan Pie Stampin’ Blends.

With my focal point stamped and ready to go, it’s time to assemble. Adhering this piece to a mat of coordinating cardstock, adds a touch of contrast and emphasis to the design. Finally, let’s embellish this creation with the coordinating Adhesive-Backed Swirl Dots.

Using the Latte Love Stamp Set
Images Copyright Stampin’ Up! (Registered) 1990-2024

And there you have it – a charming card that’s as delightful to create as it is to receive. With the Latte Love stamp set and a little creativity, the possibilities are endless. So why not brew up some inspiration of your own and see where your imagination takes you?

Whether you’re a seasoned crafter or just starting out, crafting with the Latte Love stamp set and a card sketch is a delightful way to express your creativity and spread a little joy to those you love. So grab your stamps, ink, and paper, and let’s get crafting!

The products I used for my card can be purchased HERE. They can be purchased individually, in a bundle, or get it all in the Suite!

Until we meet again. . .

Judi's online store

How to Decorate Your Envelope to Match Your Card

How to decorate your envelope, what? Does this sound a little silly to you? Before I started making my own hand-made cards I never gave my envelopes a second thought. But now, I tell everyone,” We don’t like naked envelopes!”

We work so hard on making the perfect card for our loved ones. Sticking it into a plain white envelope just doesn’t make sense! Give them a sense of mystery and intrigue for what’s inside.

Here’s a card I made this card on a You Tube Live. It was so much fun to make!

Images Copyright Stampin’ Up! (Registered) 1990-2024

Watch the live HERE to see how I created the card & the mask for the large balloons! Be sure to subscribe to my channel so you don’t miss out on any of my free, live classes!

The stamp set I used is “Hey Chuck” which is retiring on April 30, 2024. This means it will be unavailable to order from me after that date.

But on to why I am writing this post today.

How to Decorate Your Envelope to Match Your Card . . .

As I said, when I started my stamping journey, I never considered decorating my envelopes. It wasn’t until I threw a stamped image onto a card to a friend that changed things. I remember that envelope, that rocked my world, to this day. It was a Very Vanilla envelope that I stamped an image of a leaf. Whatever possessed me to do this? I was doing the spritzing technique and had inked up the stamp an extra time. Not wanting to waste a beautiful image. I grabbed the envelope and Walla! No more naked envelopes!

It is quite easy to add a little pizzaz to your envelopes. Here are a few tips:

  • Choose an image from the stamps you use on your card
  • stamp the image using a color from the palette you used.
  • stamp the image & color it

That’s it! Wasn’t that easy, peasy?

Here is the envelope I made to match the birthday card above.

How to Decorate Your Envelope to Match Your Card
#HeyChuck
Images Copyright Stampin’ Up! (Registered) 1990-2024

I didn’t use any of the images found on the card, however it is one from the set and it coordinates!

Until we meet again. . .

Judi's online store
Up to 60% off Stampin' Up! products
CLICK ON IMAGE! These products are available until April 30, 2024 OR until supplies last

Let them know they’re on your mind.

Let them know they’re on your mind when you send warm thoughts by creating a “Thinking of You” Card with Lasting Joy.

In a world where connection means everything, taking a moment to let someone know you’re thinking of them can truly brighten their day. Today, we’re diving into the art of sending warm thoughts with a beautiful card using the “Lasting Joy” stamp set. And here’s a little secret – we’re making it even easier by using Memories & More Cards & Envelopes as the base!

The “Lasting Joy” stamp set is filled with smaller floral designs that perfectly capture the sentiment of care and affection. With its delicate details and heartfelt messages, it’s the perfect choice for creating a heartfelt “Thinking of You” card.

Now, let’s talk about our color palette. For this special card, we’re opting for a vibrant combination of Calypso Coral, Crushed Curry, Pebbled Path, and Pretty Peacock. These colors give the feeling of warmth, joy, and tranquility. This is the perfect blend for sharing heartfelt sentiments to someone special.

Using the Sweet Thoughts Memories & More Cards & Envelopes as a starting point simplifies the process without sacrificing quality. These pre-cut and pre-scored cards provide a sturdy foundation for our creation. This ensures that our “Thinking of You” card will be both beautiful and durable.

Let them know they’re on your mind while simplifying the process!

Sweet Thoughts Memory & More Cards & Envelopes.
Images Copyright Stampin’ Up! (Registered) 1990-2024

To begin, we’ll stamp the sentiments onto the basic White mat in Pebbled Path ink. *TIP: I used the “E” Block, put several sentiments on with spacing to make this step a little simpler! The floral design of with the 5 images was stamped next onto the card front using Calypso Coral. The single leaf stem and the leaves around the flowers were stamped in Pretty Peacock next. Did you notice I started with my largest images and moved to the smaller to fill in the spaces? This is a fun way to create your own patterned paper in the colors of your choosing.

Next, we’ll add,” Thinking of You” to the smaller Basic White mat. There are several fitting sentiments in this stamp set. Expressing our warmest wishes and letting the recipient know they’re in our thoughts. Whether it’s a simple “Thinking of You” or a more personalized note, taking the time to reach out in this way adds an extra layer of warmth and sincerity to our card. Next, I stamped the same floral and leaves to match the previous mat.

Place the Pretty Peacock and Pebbled Path strips to a Basic White mat. Adhere this to the sentiment mat for the focal point. Finally, we’ll add a few finishing touches – a fussy-cut flower in Calypso Coral and a Pebbled Path ribbon.

Let them know they're on your mind  with a Lasting Joy card
Images Copyright Stampin’ Up! (Registered) 1990-2024

And there you have it! A heartfelt “Thinking of You” card that’s sure to bring comfort and joy to the recipient’s heart. With the “Lasting Joy” stamp set and a dash of creativity, sending warm thoughts has never been easier or more meaningful.

So why not take a moment today to reach out to someone special? Whether it’s a friend, a family member, or a colleague, a handwritten card is a simple yet powerful way to show you care. CLICK HERE to see another card that also uses the Lasting Joy stamp set.

Judi's online store

Celebrating National Ice Cream Day is a love of ours.

Celebrating National Ice Cream Day is always a day we enjoy. However, we missed the celebration this year. Technically, this day has already past (Feb. 3rd), but hey… isn’t ANY day potentially National Ice Cream Day? Unfortunately, we had dentist and doctor appointments and it’s no fun eating ice cream with a numb mouth.

We have always enjoyed a good ice cream cone. When Dave & I dated we would always visit Baskin Robins on our dates. I would get a scoop of chocolate almond with a scoop of orange sherbert on top of a sugar cone. Dave would get a scoop of rocky road with a scoop of orange sherbert on top. Yes, basically they were the same but I don’t like marshmallows in my ice cream.

The weather was nice a few days last week and we decided it was an ice cream kind of day. We were ready to begin Celebrating National Ice Cream Day. We headed to Rainbow Cone for a treat. Rainbow Cone is a Chicago tradition for over 95 years. They still stack the same five flavors today as they did back then. They slice, not scoop, all five flavors into a cone or cup. These five flavors are: Orange Sherbet, Pistachio, Palmer House, Strawberry, and Chocolate.

Celebrating National Ice Cream Day

The flavor corresponds with the color the name is written on the sign. I didn’t know what the Palmer House flavor was. In case you are wondering, it is New York vanilla with cherries and walnuts. I will admit that these aren’t necessarily flavors I would choose to go together but they are great!

I first heard about the Rainbow Cone when friends got excited to hear the truck was going to be in the next town over. We stopped by the parking lot the truck was supposed to be, and it was packed! We decided to head home and try a different time and location.

Celebrating National Ice Cream Day isn’t just one day a year according to us!

Fast forward 6 months and I saw this! A Rainbow Cone store near us!! I just love the bright pink with giant white polka dots all over. I couldn’t wait to go home and tell Dave my discovery. You know it. We headed out for our first Rainbow Cone.

Here’s a picture of Dave’s cone.

National Ice Cream Day at Rainbow Cone

What? Only four slices? Nope. The fifth slice, which is chocolate, is on the inside of the cone. You can see some peeking out in the lower left side of the cone.

Celebrating National Ice Cream Day is a weekly occurrence for us and a great reason to go enjoy an ice cream cone! I hope that you too, take time to enjoy a cone or bowl.

Until we meet again. . .

Judi's online store

How to Craft a Vibrant Thank You Card with Flowers

How to Craft a Vibrant Thank You that is special. Sending a cheerful thank you is rewarding. In the world of expressing gratitude, making a card is like painting a picture. Today, I’m excited to share a cheerful card that turns a simple thank-you note into a burst of colors and pattern.

Imagine a floral pattern with bold red, white, and pink flowers on a calm blue background. It’s like giving someone a forever bouquet, a joyful mix of colors that feels like a party in a garden. I love how the bright Poppy Parade, Basic White, and Petal Pink flowers stand out on the Pool Party background. These colors add a bit of bright and soft at the same time. If I had more of this pattern showing I don’t think it would have the same calming feel.

How to Craft a Vibrant Thank You
Images copyright Stampin’ Up! 1990-2024

How to Craft a Vibrant Thank You starts with a few simple supplies.

The main part of this creation is the thank-you message. I carefully stamped the sentiment on a piece that is cut from the Perennial Postage Dies spotlighted it. Wanting layers, I cut Petal Pink cardstock with another die from the Perennial Postage set and another from the Scalloped Contours Dies.

Perennial Postage Dies
Images Copyright Stampin’ Up! (Registered) 1990-2024
Scalloped & Contours dies
Scalloped & Contours Dies
Images Copyright Stampin’ Up! (Registered) 1990-2024

I added a little extra charm to my design with flowers from the Adhesive-Backed Hearts & Flowers. These tiny decorations that match perfectly with the floral pattern. They’re like little surprises that make the card even more special.

To finish it off, there’s a ribbon with a black and vanilla checked pattern. It’s a simple touch, like tying a bow on a gift or putting the last piece in a puzzle. It makes your thank-you card look complete.

How to Craft a Vibrant Thank You
Images copyright Stampin’ Up! (R) 1990-2024

Sending a cheerful thank you is like spreading joy and happiness.

When you hold this card, it’s not just saying thanks; it’s like giving a piece of happiness. It’s a colorful way to show you appreciate someone, like a burst of thanks that will make them smile every time they see it. This card is not just a note; it’s a small, joyful masterpiece, ready to spread happiness with every glance.

How to Craft a Vibrant Thank You using the Sunny Days DSP
Sunny Days DSP Images Copyright Stampin’ Up! (Registered 1990-2024)

I used the bold floral paper is from the Sunny Days 12″ x 12″ Designer Series Paper (162974) that is filled with cheerful colors and fun designs that all work together. Mix and match these papers any way you like. Fussy cut the flowers and strawberries to create fun accent pieces for all your paper crafting projects.

Add these great crafting materials to your supplies at my On-Line Store Here.

Until we meet again. . . . .

Judi's online store

Making a tool themed card for the people in your life

Making a tool-themed card might seem like a construction project for some. But don’t worry, fellow crafters! Today, I’m here to share a tool-inspired creation that will have you reaching for your tape runner instead of your hard hat.

Starting with the Trusty Toolbox 12 x 12 Designer Series Paper—a designer series paper that makes selecting the right pattern as easy as finding the right-sized wrench in a cluttered toolbox. Want to know the best part? It’s currently a Level 1 choice for Sale-A-Bration, which means you can snag it for free* right now. It’s like finding that missing screw at the bottom of your toolbox, totally unexpected but oh-so-rewarding.

Images copyright Stampin’ Up! (Registered) 1990-2024

I chose a basic white card base. The large mat steals the spotlight with a screwdriver pattern in real red and white. Whether we know what we’re doing or no, we’ve all pretended to be a handyperson.

Now, let’s look at the gray granite paper. It’s adorned with flathead and Phillips head screws and bolts. This reminds us that, in the crafting world, sometimes things need a little tightening or loosening, just like in life.

What’s a tool-themed card without a strip from the larger tools pattern and a measuring tape strip thrown into the mix? It’s like adding a touch of DIY charm to your creation, because who doesn’t appreciate a good measure?

Making a tool themed card is more than just paper.

Using the Tool Time stamp set, I stamped the tape measure and colored it in Real Red and Daffodil Delight. Because let’s face it, nothing says “I measure up” better than a brightly colored tape measure, right? The finishing touch is the sentiment mat. I punched basic white and Lost Lagoon using the punch. To create the border, I cut the Lost Lagoon in half before adding it to the back of the basic white.

Making a tool themed card
Images copyright Stampin’ Up! 1990-2022

So, grab your crafting tools, leave the heavy-duty equipment in the garage, and let’s go on a tool-themed adventure together. Because when life hands you lemons, you might as well try to build a lemonade stand. And when it hands you Tool Time paper during Sale-A-Bration, you build a tool-themed card for the people in your life.

*Disclaimer: No actual tools were harmed or used in the making of this card. The only injury sustained was to the crafter’s ego when they realized they couldn’t tell a Phillips head from a flathead screw. Crafting casualties, we salute you!

Judi's online store

All products used in this project can be purchased through my online store.

Sale-A-Bration catalog
Click image to view catalogs!

There is more to celebrate with added Sale-A-Bration offers!

There is more to celebrate! Today there were products added to the offerings for Sale-A-Bration.

You have two choices when it comes to what you can choose for your FREE items with a qualifying purchase.

Here, in the United States, for Level 1 you need to have a minimum $50 purchase. For Level 2 you need to have a minimum $100 purchase. When you reach $100 you can choose 2, Level 1 offerings or one Level 2 offering. There is no limit to the number of items you can choose, you just need to meet the required purchase.

Beginning today, February 1, 2024, there are an additional eight Level 1 choices and an additional two Level 2 choices. Here is a photo of the items add today.

There is more to celebrate
Images copyright Stampin’ Up! (Registered) 1990-2024

There’s more to celebrate today!

Here are the item numbers and links for a better look at the NEW additions.

LEVEL 1

LEVEL 2

As you can see there is a big variety in these new additions. You can choose from stamp sets, designer series paper, kits, embossing folders, Memories & More cards & envelopes, Stampin’ Write Markers, & a punch. You want to be sure to use the item numbers listed above, not the one’s in the catalog.

View all of the Sale-A-Bration offerings HERE. I am sure you agree that there is more to celebrate today! (and the next 28 days)

Until we meet again…..

Judi's online store

Let’s make a gift card holder others will love.

Let’s make a gift card holder that is great for any occasion. I have decorated my pillow box in a Valentine theme, but you can choose to decorate it for any occasion.


Sweet Treats in a Box: Crafting Adorable Pillow Box Delights

Purchase a package of Pillow Boxes or the new Stampin’ Brayer through January 31, 2024, and receive 3 FREE Tutorials using the pillow boxes and brayer! *This offer is exclusively through Judi Anderson and must be purchased through her Online Store.

I’m diving into the world of sweet surprises—the pillow box! This delightful box is found in a pack of 10 on pages 9 &76 of the Jan – April Mini Catalog. My box is adorned with cute Poppy Parade hearts from the Country Bouquet stamp set, stamped directly onto it. I’ve used bits of the Bee Mine DSP for my project. Loving the pattern featuring white flowers on a Sweet Sorbet background, I used it to add accents on the box and tag.

Let’s make a gift card holder to make what is inside extra special!

Now, let’s talk about the star of the show—the beaver from the Fluffiest Friends stamp set. Using Pecan Pie Classic Ink Pad, I stamped the beaver onto a piece of scrap basic white cardstock. With a few colors of the Natural Tones Stampin’ Blends, I colored it. These colors are great to color more than skin types is something most don’t think of. I used the; Light, Medium, and Medium Deep along with the Color Lifter. This adorable critter comes to life, adding an extra touch of charm to the pillow box.

Images Copyright Stampin’ Up! (Registered 1990-2024)

To tie it all together, quite literally, I wrapped the Sweet Sorbet 1/4″ Bordered Ribbon around the pillow box, creating the perfect spot to attach the tag. Speaking of the tag, it shares the same Bee Mine DSP, making it a harmonious addition to this sweet ensemble.

This pillow box isn’t just cute; it’s versatile too. It’s the perfect size for tucking in a gift card holder, a favorite candy treat, or even a small store-bought cake treat. Imagine creating these as favors for any occasion—a birthday party, baby or wedding shower, wedding favors, and more. The possibilities are as endless as your creativity!

And the best part? Pre-make an assortment of these and keep them flat until you need the perfect gift card, gift, or treat holder. It’s a simple yet thoughtful way to spread a little joy, one adorable pillow box at a time. Let’s, get ready to craft and share the sweetness!

Images copyright Stampin’ Up! (Registered) 1990-2024

Until we meet again. . . . .

Judi's online store

The Demonstrator Kit Offer, what is it all about?

The Demonstrator Kit Offer

The Demonstrator Kit offer is running now through Feb 29, 2024. Several of you have asked me what, exactly the offering is. I decided to share the details today. You have two options, the first is an additional $30 in product of your choice, and the second is the Glass Mat Studio *a $60 value in the U.S.

Would you like to:

  • Get 20%–25% off all Stampin’ Up! products?
  • Pay for your own craft supplies?
  • The opportunity to earn a money outside your regular job?
  • Turn your passion for papercrafting into an income?
  • Make your own work schedule?
  • Exclusive, early access to new products?
  • Receive support through online training resources, events, and a demonstrator-only online community with thousands of project ideas?
  • Have access to regular promotions?
  • Learn creative tips and techniques, share ideas, and meet new friends and teammates who love paper crafting as much as you do?
  • A free Paper Pumpkin kit! (Ask me for more information about this subscription service.)

When you join during Sale-A-Bration, you can begin building your Starter Kit with the standard kit by choosing $125 of products for only $99 PLUS choose one of these two offers ~

The Demonstrator Kit Offer

Choose Your Starter Kit

Join during Sale-A-Bration and choose between two fabulous offers:


Option 1: Get $125 worth of product PLUS an additional $30 worth of product of your choice when you join for $99. That’s a $155 value!

Option 2: Get $125 worth of product PLUS our new Stampin’ Glass Mat Studio (a $60 value) for just $99!

What is in the Stampin’ Glass Mat Studio?

Stampin' Glass Mat Studio 163987, #CraftGlassMat
Glass Mat Studio #163987
  • Glass Mat. 17″ x 14″. 5mm thick. Heavy Duty, tempered glass with raised nonslip feel.  White background with printed grid.  Heat and scratch resistant. Wipes clean.
  • a Silicon Mat. Nonslip, multiuse mat that features 4 palette squares. Waterproof, heat resistant.
  • Cleaning Cloth. 8 1/4″ square. Just add water and wipe. Lint free.  Chemical free.

No matter which one you choose, you’ll also receive:

  • A business supply pack, which includes brochures, catalogs, order forms, and other resources to get you started.
  • Free shipping for your Starter Kit!
  • A free Paper Pumpkin kit! (Ask me for more information about this subscription service.)

Join my team and you can help others discover the joy that comes with creativity!

JOIN MY TEAM HERE, NOW

Please contact me if you have any questions about these fabulous offers on The Demonstrator Kit Offer.

EMAIL: judi@judistamps.com

TEXT? CALL 630-853-1908

Until we meet again. . .

Judi's online store

Hot air balloons card in pastels is easy to create.

Hot air balloons have always been a fascination of mine and my children. I remember the days of the local hot air balloon festival over the Fourth of July. We would get up early, drive 30 minutes to watch them race across the sky in the early mornings. We would watch the newspaper to see who won each day.

I believe that is why I am in love with the Lighter Than Air Suite in our new Jan. – April 2024 Mini Catalog. Loving the stamp set & die bundle is just the beginning of this suite. There’s a Baker’s Twine Three Color Pack of Flirty Flamingo, Lemon Lolly, and Balmy Blue. Don’t forget the Rainbow Adhesive-Backed Dos, you get 20 each of eight colors! Bringing up the rear is the Lighter Than Air 6″x6″ Designer Series Paper (DSP). This paper pack has six double- sided designs that will knock your socks off! Luckily, you get eight sheets of each double-sided design.

My card uses a few sheets of the DSP to create a unique design. The stripes and the blue patterned paper use both sides of one sheet. When finished, I only had a 1 3/4″ x 2″ left of this piece. I cut the hot air balloons from another sheet of paper.

Hot air balloons #LighterThanAirSuite
Images Copyright Stampin’ Up! (R) 1990-2024

Hot air balloons come in all shapes and colors.

The shapes in this patterned paper are mostly regular and heart shapes. You will find these colors used in this paper. Petal Pink, Lemon Lolly, Pool Party, Balmy Blue, Bubble Bath, and Fresh Freesia.

These are the products can be purchased HERE at my Online Store:

  • Lighter Than Air DSP (162747)
  • Rainbow Adhesive-Backed Dots (162758)
  • Scalloped Contours Dies (155560)
  • Stampin’ Dimensionals (104430)
  • Lemon Lolly cardstock (161720) 5 1/2″ x 8 1/2″ scored @ 4 1/4″
  • Basic White cardstock (159276) 2 @ 5 1/4″ x 4″
  • Lighter Than Air 6″ x 6″ DSP (162747)
    • Blue pattern, 4″ x 5 1/4″, 3/4″ x 4 1/4″, 2″ x 4 1/4″ (this uses stripes side)
    • Balloon pattern, cut a group of 2, & a partial from the bottom edge

Here is a view of the inside of the card. Note how I utilized a hot air balloon image that was cut off along the bottom edge of the 6″ x 6″ paper. If you purchase the entire Suite (162761) you qualify for a Level 1 Sale-A-Bration product for FREE!! * Now through February 29,2024)

Lighter Than Air Suite (162761)
Images copyright Stampin’ Up! (R) 1990-2024

I shared this card in my live class at noon today on my Facebook Page HERE.

Until we meet again. . .

Judi's online store

Sunny Days Paper a Level One offering for you.

Sunny Days Paper filled with sweet cherries from the Sunny Days 12” x 12” Designer Series Paper (162974). It is just one of the Level 1 Sale-A-Bration offerings you can choose. And the best part? You can earn it for free with a qualifying purchase of $50 in the US.

This pack of paper is filled with an assortment of designs on double-sided papers. I love the fact that many of the designs coordinate with products in both the Jan.– April Mini and Annual Catalogs. The cheerful colors and designs all work together. You can mix and match the patterns any way you like. Try fussy cutting the flowers and strawberries to create fun accent pieces for all your paper crafting projects.

Sunny Days DSP
Sunny Days Designer Series Paper Images (C) Stampin’ Up! (R) 1990-2024

Today I am sharing a particular design that has stolen my heart. This sheet of paper, adorned with mini cherries and is a perfect companion to the Sweetest Cherries stamps (158711). You will find this set on page 20 of the 2023-2024 Annual Catalog. Don’t forget, the Cherry Builder Punch (158716) helps you create quick punched cherries from stamped images or cardstock!

Sunny Days paper strip is used for the top section of my card.

The base is 6″ x 5 1/2″ piece of Real Red cardstock, scored at 1 3/4″ on the 6″ edge. The DSP strip is 1 1/2″ x 5 1/4″. A piece of Basic White cardstock (4″ x 5 1/4″) with a 2″ x 5 1/4″ strip of the plaid DSP along the bottom is for the inside of the card. I also combined the plaid pattern from another Sale-A-Bration offering, the Most Adored 12” x 12” Specialty Designer Series Paper (162976). This plaid pattern compliments the cherry pattern while adding interest to my design.

Sunny Days Paper

Imagine sending a burst of cheer and brightness to someone’s mailbox with this card. This bright and cheery thank you in the colors of Real Red and Shaded Spruce is sure to brighten anyone’s day. The combination of the Sunny Days DSP with the Sweetest Cherries stamp set creates a design of harmony. I feel the possibilities for expressing your gratitude in a joyful way is endless with this combination.

Sweetest Cherries stamp set

Until we meet again. . .

Judi's online store

A Happy Holiday Wish to you and your family.

A Happy Holiday Wish: “Merry Christmas from Our Crafting Family to Yours”

As the holiday season wraps us in its warmth and joy, I extend my heartfelt wishes to each and every one of you, my dear readers and fellow crafting enthusiasts. It’s a time to cherish moments, spread cheer, and create lasting memories. In the spirit of this festive occasion, I wanted to take a moment to wish you all a Merry Christmas.

This holiday, I wanted to share a little piece of the season’s magic with you. Attached to this post, you’ll find a glimpse of a Christmas card I’ve crafted—a visual embodiment of the timeless holiday spirit. The classic colors of red, green, and silver adorn this card. These colors evoke a sense of tradition and elegance. I carefully chose each element carefully to evoke the essence of the season. Embellishing my card with green holly leaves, vibrant red berries, and shimmering silver sparkle paper sprigs.

The background of the card boasts an intricate embossing of musical notes. These are a subtle reminder of the harmonious melodies that accompany the holiday season. My card is a symphony of colors and textures. A small creation that captures the spirit of giving, joy, and togetherness that defines this special time of year.

A Happy Holiday Wish

A Happy Holiday Wish with Christmas CLassics stamp set

Beyond the card lies a deeper sentiment—a wish from my heart to yours. May this Christmas is filled with moments that warm your soul. Laughter that echoes through your home, and the embrace of loved ones, whether near or far. May the sparkle of the season illuminate your days with hope. May the melodies of joy and peace resonate in your hearts.

Thank you for being a part of our crafting family. Your support, enthusiasm, and creativity have been an inspiration throughout the year. As we come together in celebration, I wish you all a Merry Christmas and a holiday season filled with blessings and beautiful memories.

From my crafting space to yours, may your days be merry and bright. Merry Christmas!

Until we meet again. . .

Crafting Gratitude: Thank You Cards from Holiday Leftovers is simple

Crafting Gratitude by creating Thank You Cards from your crafting leftovers. What a great way to stretch the use of your holiday crafting supplies! The holiday season prepping may have passed, but the joy of crafting continues! Don’t pack away those leftover holiday paper crafting supplies just yet. Instead, let’s repurpose and transform them into heartfelt expressions of gratitude with handmade thank you cards. These cards not only extend appreciation but also breathe new life into remnants of festive cheer. Today I’m turning leftover holiday supplies into delightful thank you cards. These cards convey appreciation in the most heartfelt manner.

Materials Reimagined: Gather your leftover supplies—holiday-themed papers, ribbons, embellishments, and stamps. Look beyond their seasonal context. Envision how these remnants can turn into charming elements for your thank you cards. Embrace the challenge of repurposing and infusing new life into these materials, giving them a purpose beyond their initial holiday theme.

I am using products in the Beary Christmas Suite. These products are on our Last Chance List which are available while quantities last. I have used the Beary Christmas Memories & More Card Pack (162027). For the bases I am using the Memories & More Cards & Envelopes (162028). Using these along with other supplies I have, makes these cards quick to create. Both of these products would be great to get to have your children make some card too!

Designing Your Thank You Cards: Start by selecting a base. Embrace the festive colors, patterns, and textures, but reimagine their use. Cutting them into smaller pieces or use punches and dies to create unique shapes or borders. Incorporating the 3 x 6 cards for the second layer helps to add flair to the designs.

Crafting Gratitude with the 3 x 6 Memories & More Cards

Choosing the blue card base for my first card gave me the flexability to create a more wintery thank you card. I chose a 3 x 6 card with snowflakes. The white blank space gives a nice backdrop for the sentinment. The seal is a self-adhering, repostitionable die cut. A few self adhering sequins ads some sparkle.

Crafting Gratitude with the #BearyChristmasSuite

My second thank you card is perfect for a thank you for a gift. I chose to use a 4 x 6 and 3 x 4 card for this design. Watch my video below to see how I altered the 4 x 6 card. Again, the white space is perfect for the sentiment. Adding sparkle on this card is the Starry Sky Metallic Ribbon that mimicks a ribbon on a gift.

Thank you card with #BearyChristmasMemories&More

Let your creativity flow as you arrange and layer these elements onto your cards. Stamp or handwrite heartfelt thank you messages, pairing them with the repurposed holiday-themed elements. Each card becomes a unique piece of art, a blend of repurposed holiday remnants and heartfelt sentiments.

Personal Touches and Final Flourishes: Consider adding personal touches—a hand-drawn doodle, a pressed flower, or a photo—to make each card truly special. Experiment with different layouts and arrangements until you achieve a design that resonates with your gratitude. Complete your handmade thank you cards with finesse, ensuring they’re ready to convey appreciation and joy to their recipients.

Handmade thank you cards crafted from leftover holiday paper crafting supplies are a testament to creativity and gratitude. Embrace the art of repurposing, transforming remnants of holiday cheer into personalized expressions of appreciation. Each card becomes a unique blend of creativity, resourcefulness, and heartfelt thanks—a perfect way to extend gratitude and keep the spirit of crafting alive beyond the holiday season.

Until We meet again. . .

Judi's online store
Last Chance products